Hi Friends,
welcome to goRepairHub,
To install “HDD Sentinel” in windows, open this url, download the “HDD Sentinel” setup file, and extract and run it as administrator then you do some basic steps. it will be installed in your system.
We are going to install"HDD Sentinel" and then we have to follow bellow steps.
Let’s start the tutorial to install and configure “HDD Sentinel” in windows.
method-1
download the setup file.
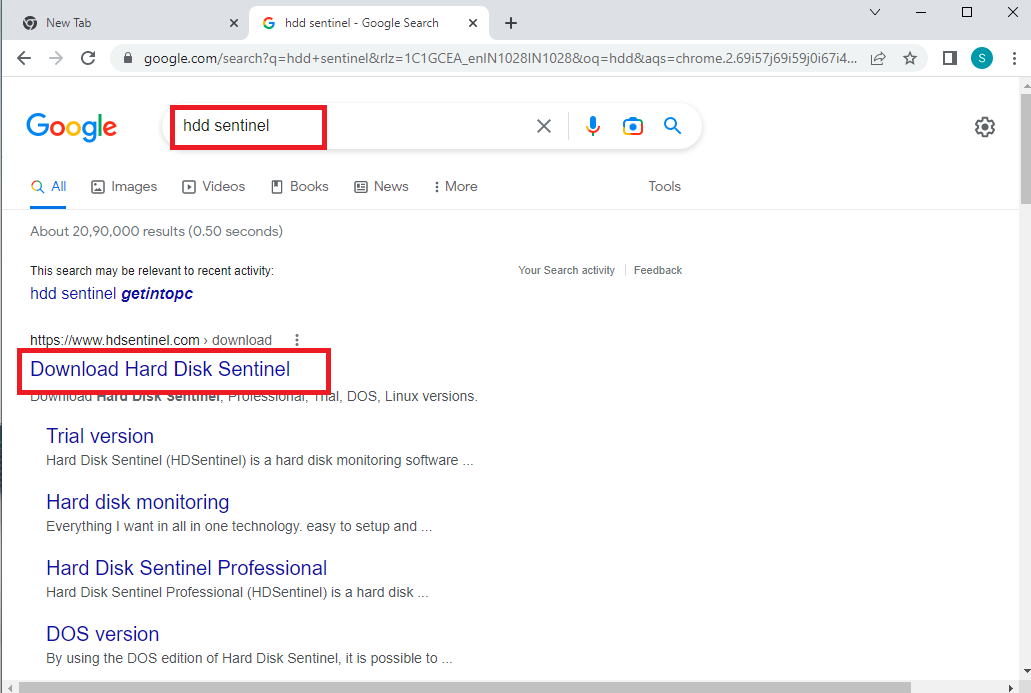
go to your google chrome and type “HDD Sentinel” go to the link hdd-sentinel
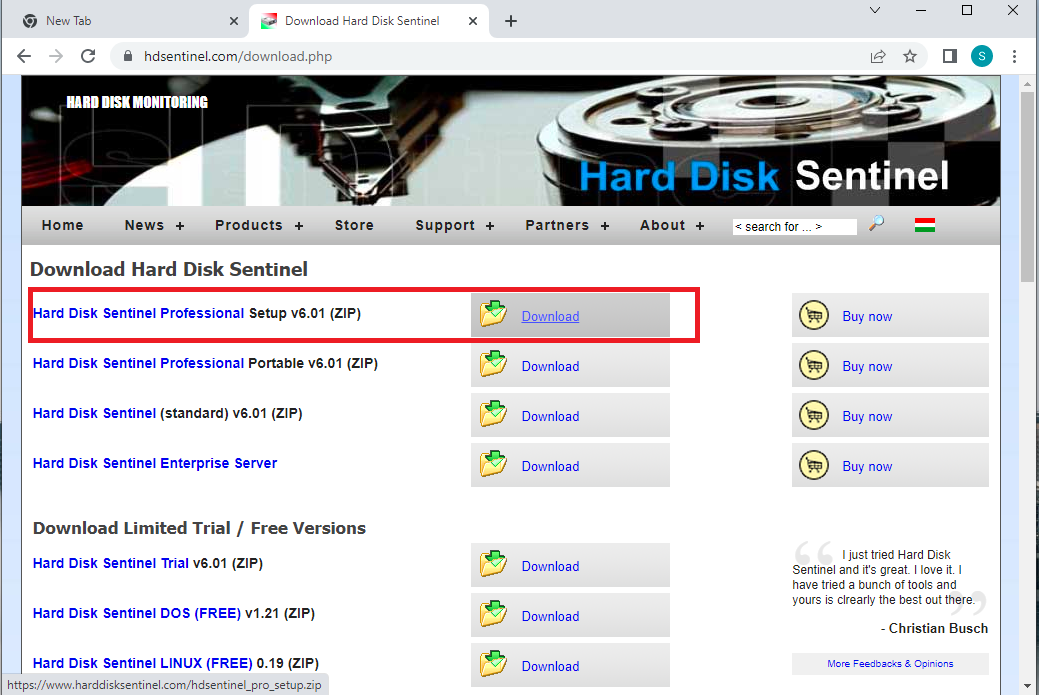
then go and select “Hard Disk Sentinel Professional Setup v6.01 (ZIP)” download the setup file
Extract the setup file.
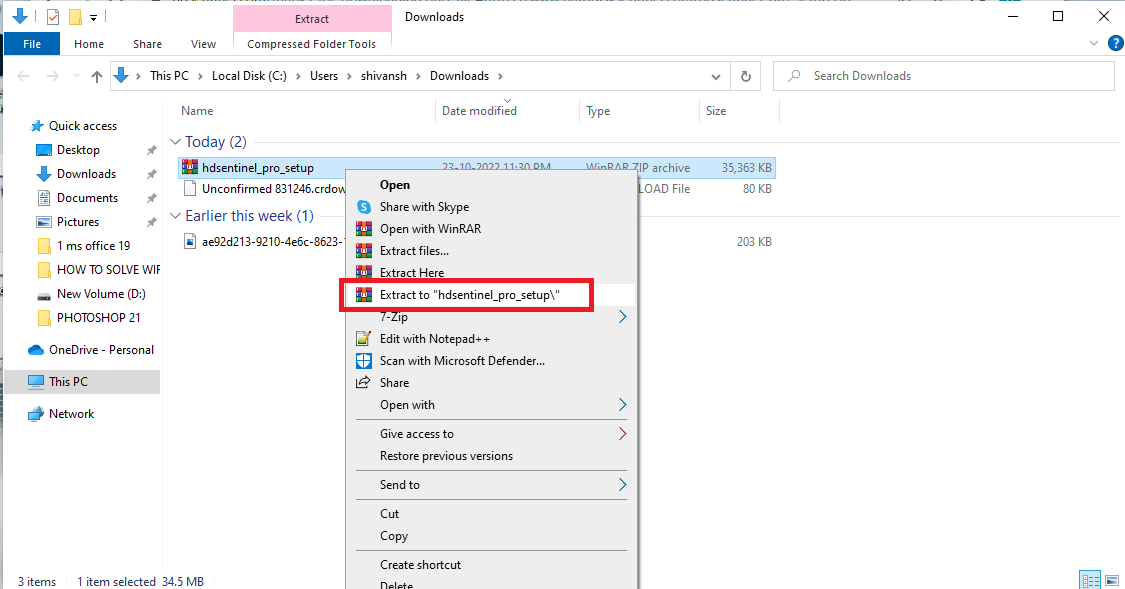
go to the downloads folder right click on “hdsentinel_pro_setup” and extract it and then go “hdsentinel_pro_setup” folder.
installation of HDD software.
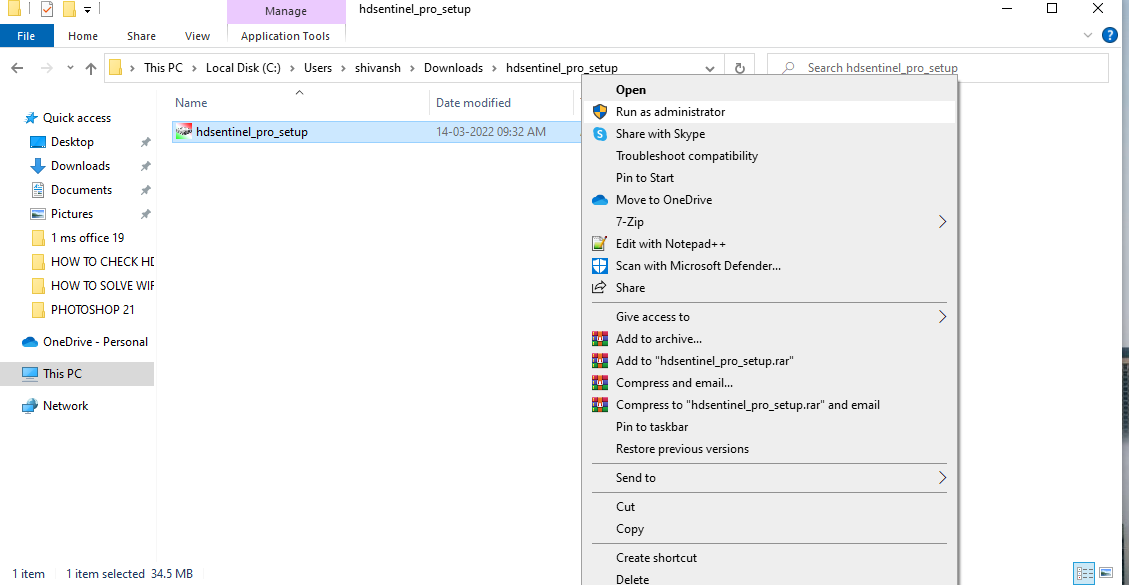
Right-click on the “hdsentinel_pro_setup.exe” and run as administrator, select language “English” then press ok.
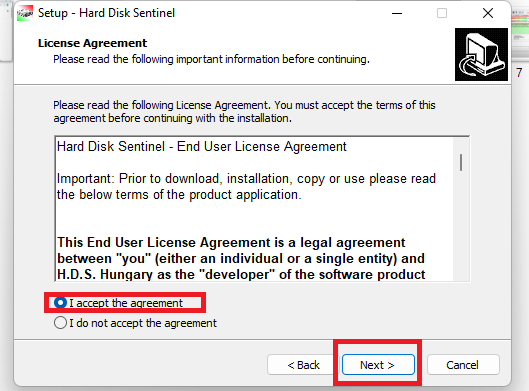
- read the ’license and agreement and then click on I accept the “license and agreement” and then click on the next select the destination location of software and then click on next and install the “HD sentinel” software.
Yeah, you have the installation process done Go to the start menu and open the “HDD Sentinel” and use it.
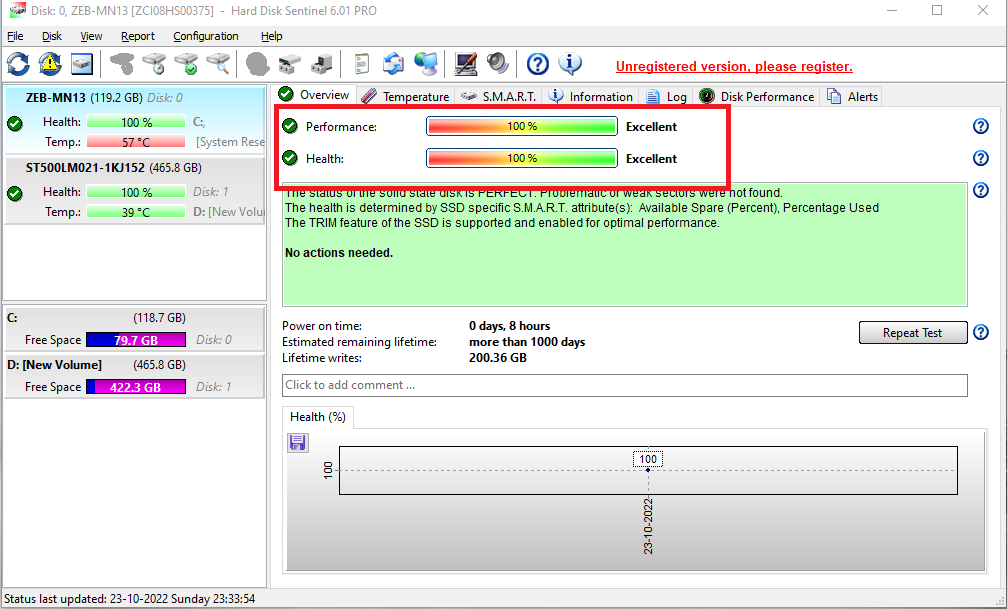
*That also shows the importance of being notified about all disk problems to prevent data loss and costly data recovery.
method-2
Command Prompt
To check the health of a hard disk drive (HDD), you can use a tool called “Check Disk” or “chkdsk.” This tool is built into the Windows operating system and can be used to scan the HDD for errors and fix any problems that are found. Here is how to use the Check Disk tool on a Windows computer:
Open the “Start” menu and type “cmd” into the search bar.
Right-click on “Command Prompt” and select “Run as administrator” from the context menu.

In the Command Prompt window, type “chkdsk” followed by the name of the HDD that you want to check. For example, if the HDD is labeled as “F:” you would type “chkdsk F:”
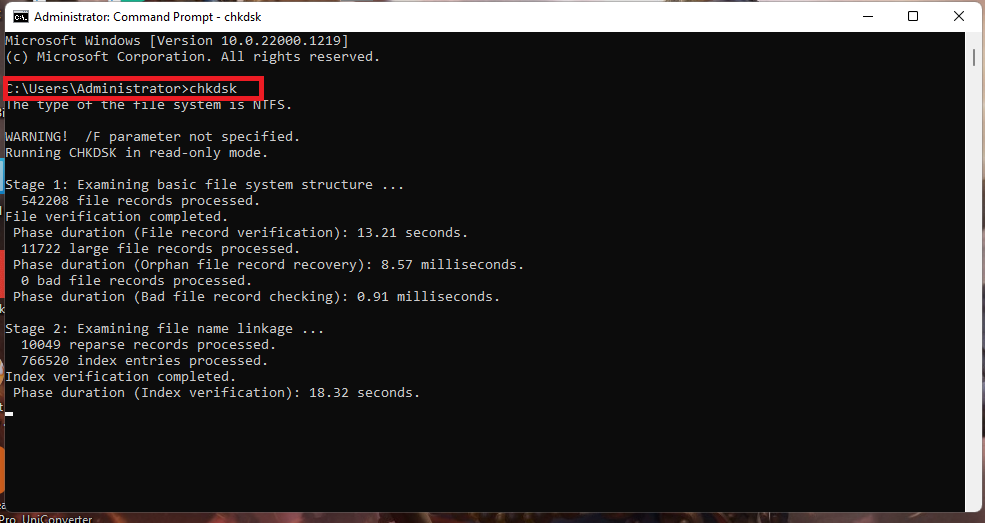
Press “Enter” to begin the scan. The Check Disk tool will automatically scan the HDD and display any errors or problems that it finds.
If any errors are found, the Check Disk tool will prompt you to repair them. To repair the errors, you will need to run the tool again, this time with the “chkdsk /f” command. This will instruct the tool to fix any errors that it finds.
Once the scan and repair process is complete, you can check the health of the HDD by running the “chkdsk /r” command. This will display a detailed report of the HDD’s health, including its overall status and any errors that were found.
It is important to regularly check the health of your HDD to ensure that it is functioning properly and that your data is not at risk. If you notice any problems or errors when running the Check Disk tool, you may need to replace the HDD or seek professional assistance to repair it.
I hope it helps you, If you are finding an issue contact me on Twitter.